How to Make Your Music Awesome
Every artist dreams of being popular and going viral, though many don't know how to get there. Well, it's not that hard! Going viral is all about good marketing and standing out at the right time. Whether or not you decide to purchase plays won’t matter unless you make awesome music that gets your fans craving more. Here are a few universal tips to make your music awesome.
1. Practice, practice, practice!
This cannot be stressed enough. Although having high-quality audio is important, equipment alone won't get you by. The later you wait to fix a mistake, the harder it will be to correct yourself. Spend more time up front to be great rather than making small fixes later. Remember, practice does not make perfect – Practice makes habits. So while you're at it, incorporate good practicing practices to get the most out of your practice sessions.
Find somewhere quiet. Get away from distractions. Go to a special place, whether it's a special room, or corner, or whatever your heart desires. Prepare yourself mentally by always practicing in the same place. If you only practice in one area, your mind will automatically associate that place with practice, and be prepared when you go.
Keep your gear and supplies nearby. Not only is it convenient for you, but it also saves a lot of time. Don’t you hate it when you sit down and turn on your laptop, only to find it's at 12%, and have to get up and track down your charger? The little things are easy to forget but when you have to search for them, it adds up to a big waste of time and you're less concentrated. Be ahead of the game. Be organized. Be prepared.
Begin with an end in mind. That doesn't mean starting backwards, or reverse engineering! Set a goal before the beginning of each practice session. Just playing through your music is not the same as practicing. When you practice, you aim to improve. Ask yourself, “What do I want to accomplish today?” and move to that goal. Not sure what you need to work toward? Take feedback from people and apply that to your music.
Practice smarter. You have to have a very focused objective. Work on a single problem in as many ways as you can. Break it down, go slow, change up the rhythm, and do what ever else you need to do until you feel you get it right. You don’t have to start at the beginning every time – that gets tedious after a while. If you don’t get it the first time around, come back to it tomorrow. Be careful though, this is not an excuse to put it off; it’s a reason to dominate it the next time around.
Musical Workout! Yes? No? Ok, we can work on that. Treat your sessions like a workout. No, really! It might sound silly, but think about it – you have to warm up by doing scales and loosening your muscles, then you work out by practicing your music, and finally you have a cool down period where you just unwind and have fun. So treat it like a musical workout. Plan ahead.
2. Improve Your Recording Environment
 This is the number one factor that impacts your recording quality. People don’t often realize how important their acoustic environment is. If you have a home studio, chances are it’s not treated as a respected recording environment. Here are some tips to keep unwanted noise to a minimum, and focus to the max.
Hard surfaces. They can be your biggest enemy since they bounce sounds around. Concrete walls, counter tops, hardwood floors, and tiled walls can create echoes in your recordings. By softening the hard surface with fabrics, such as a thick curtain or carpet, you can dampen the room and create a more acoustically sound environment. If you're changing your furniture, look for rounder furniture to diffuse the sounds bouncing off those surfaces.
Minimize the sounds taken in from your microphone. Reflective shields can help minimize the sounds picked up from the sides and back of the microphone. You could also make your own DIY vocal booth if you want! Of course, if you have a cardioid microphone, it already eliminates most sounds from the back and sides. However, these types of microphones are still sensitive to sounds from behind the vocalist. In that case, the best solution is to hang a thick blanket directly behind the vocalist, covering as much surface as possible. Stay away from desks, too. Sound can build up under there, and create some weird echoes.
The worst place to record? The middle of the room. In the middle of the room, frequencies build up and can create “standing waves.” Standing waves can create inescapable noise. They're created when you when have the same sound bouncing off parallel walls facing each other. You can fix this problem by breaking up flat surfaces – sound diffuses off of rounded or complex surfaces. This diffusion prevents both standing waves and “dead spots” – places where sound components are missing.
Shhh! When you record, make sure that everything is quiet. Keep background noise to a minimum. Turn off the AC, TV, microwave, fan, and whatever else you may have. You don’t want those extra noises in your recording!
3. Good Recording Practices
 The simple fact is, home studios do not have the hundred-thousand-dollar specialized equipment that professional recording studios have. However, high-quality sound can be achieved through good recording practices and strong mixing techniques. Here are a couple recording tips to help polish up your recordings.
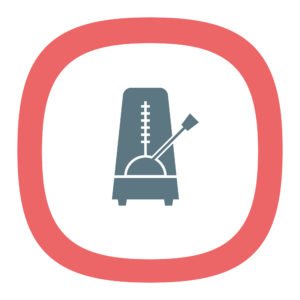
Use a metronome. Our natural time keeping goes up and down, a metronome will help maintain a more consistent tempo. This will not only make your music sound cleaner, but help speed up the digital editing process as well. The metronome will help sync up your recordings and make it easier to manipulate them later on.
Tune often. Jimi Hendrix once stopped mid-song, mid-show, to tune his guitar because it was off. Tuning before every single song (or during it) is a bit overboard, but you should at least tune before every major practice or recoding session. You want your instruments to be in tip-top shape. It’s easy to forget to tune, especially when you get in the zone. However, the last thing you want is to record with a slightly out of tune instrument, and then have to do a retake.
Use monitors and headphones. Closed-back headphones are best because the sounds from the headphones won’t bleed into your microphone. Monitors are best for mixing because they don't give you “colored” sound (deeper base, sharper mids, etc.) like speakers do. By using monitors, you have more accurate sounds for mixing and editing. Afterwards, just use your headphones for referencing. Remember to set your levels accordingly, too!
Don't talk directly into your microphone. Angle your vocals to the side of the microphone instead. This reduces the direct burst of air (the popping noise) by getting it away from the most sensitive part of the microphone. Also, position yourself six inches to a foot away from the microphone. Any closer and the recording will be loud and over saturated.
Wrap up
Becoming a famous artist or musician isn't easy, but it isn't impossible either. It all starts with awesome music and a quality sound – so practice, use good equipment, and tune your instrument! Then, just promote it online, you'll be big in no time!

Date: May 31, 2014 / Author: Rich Drees